Process of Digital Painting
- Fabulous Fuzzy

- Nov 22, 2018
- 2 min read
Updated: Jan 20, 2021
Actually, I didn't study illustration until now, and I don't think I can go to Illustration class for my design course streaming, because I'm weak in other subjects, it will lower my rate of success .
However, drawing is my hobby, so I will draw when I'm free. I am self-taught mostly, sometimes watching video tutorials and books.
Today is a good day to draw, so let's move on to the process!
1. Find a reference from the internet.

2. Import the reference image into Adobe Photoshop, and open a new document, start with some grids and use brush tool to make a draft.

3. Set the draft layer with a high transparency, and create a new layer above the draft layer, then draw the outline.

4. Then make the draft layer become invisible, create a layer below the outline layer, start with the base color, then add some shading, after finish shading, add light.
It's not needed to be accurate, being rough is okay, because refine is in the next step.

5. Create a layer below painting layer, use bucket tool to fill up the layer to make the base color of the background, then use some special brushes to create effects and add different colors in the background. For special brushes, you can buy or download for free from the internet.

6. Draw shoulders of the girl. Keep refine and use "Liquify" (Ctrl+Shift+X) to adjust the portrait until you are satisfy. I also add a layer above the girl, to create a foreground or decoration to make it more interesting. Normally, it's finished. However, it was still boring.

7. So I draw a wig for her, and adjust it's tone and contrast to make it more harmony. Being creative is important for a designer.
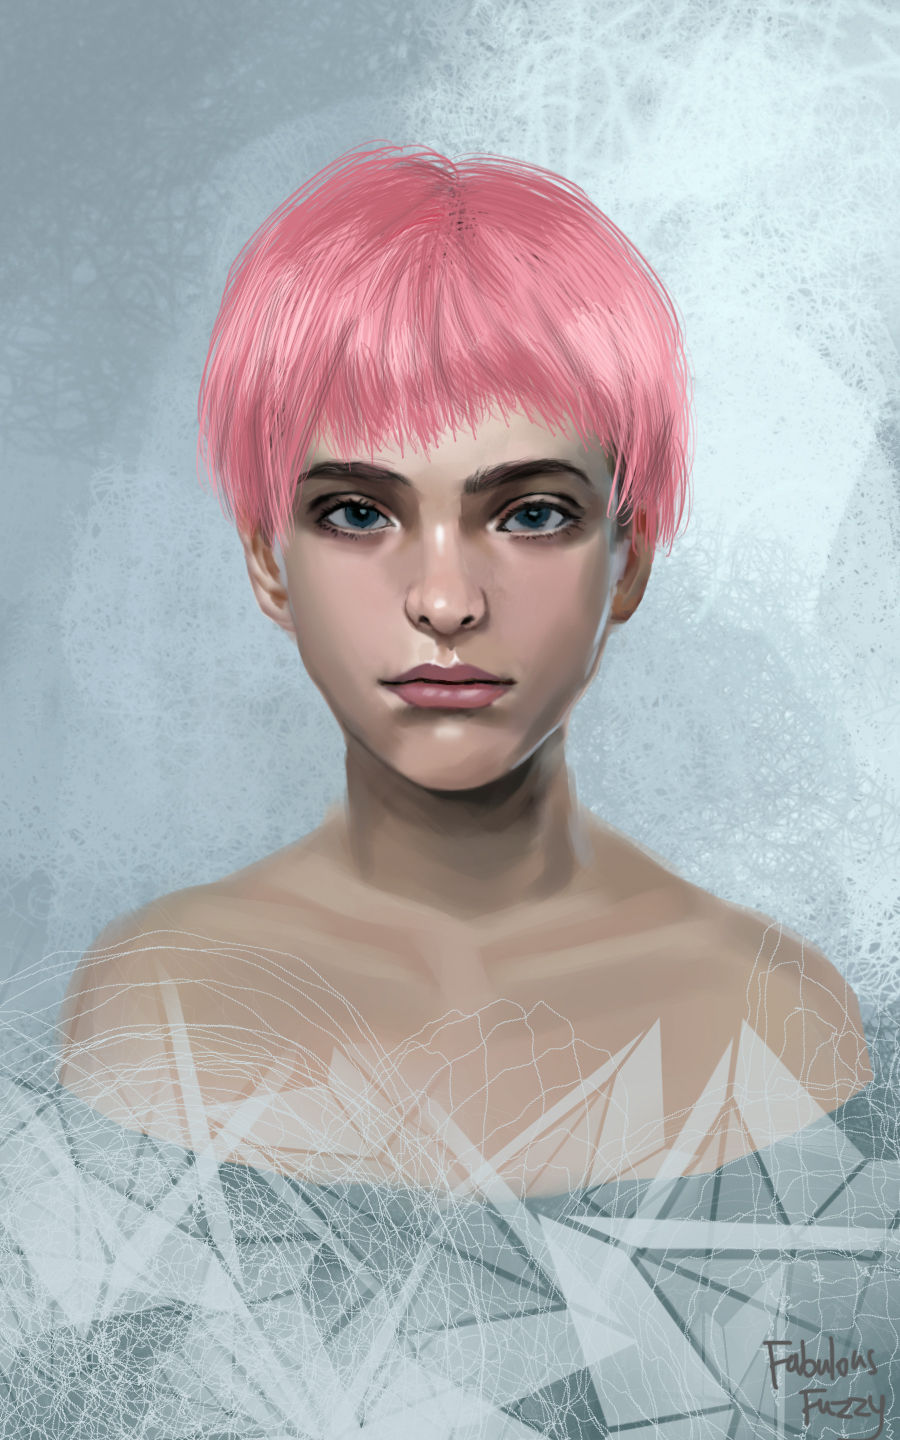
Thank you so much for reading my drawing process. It takes 3 hours to finish.
Comments